


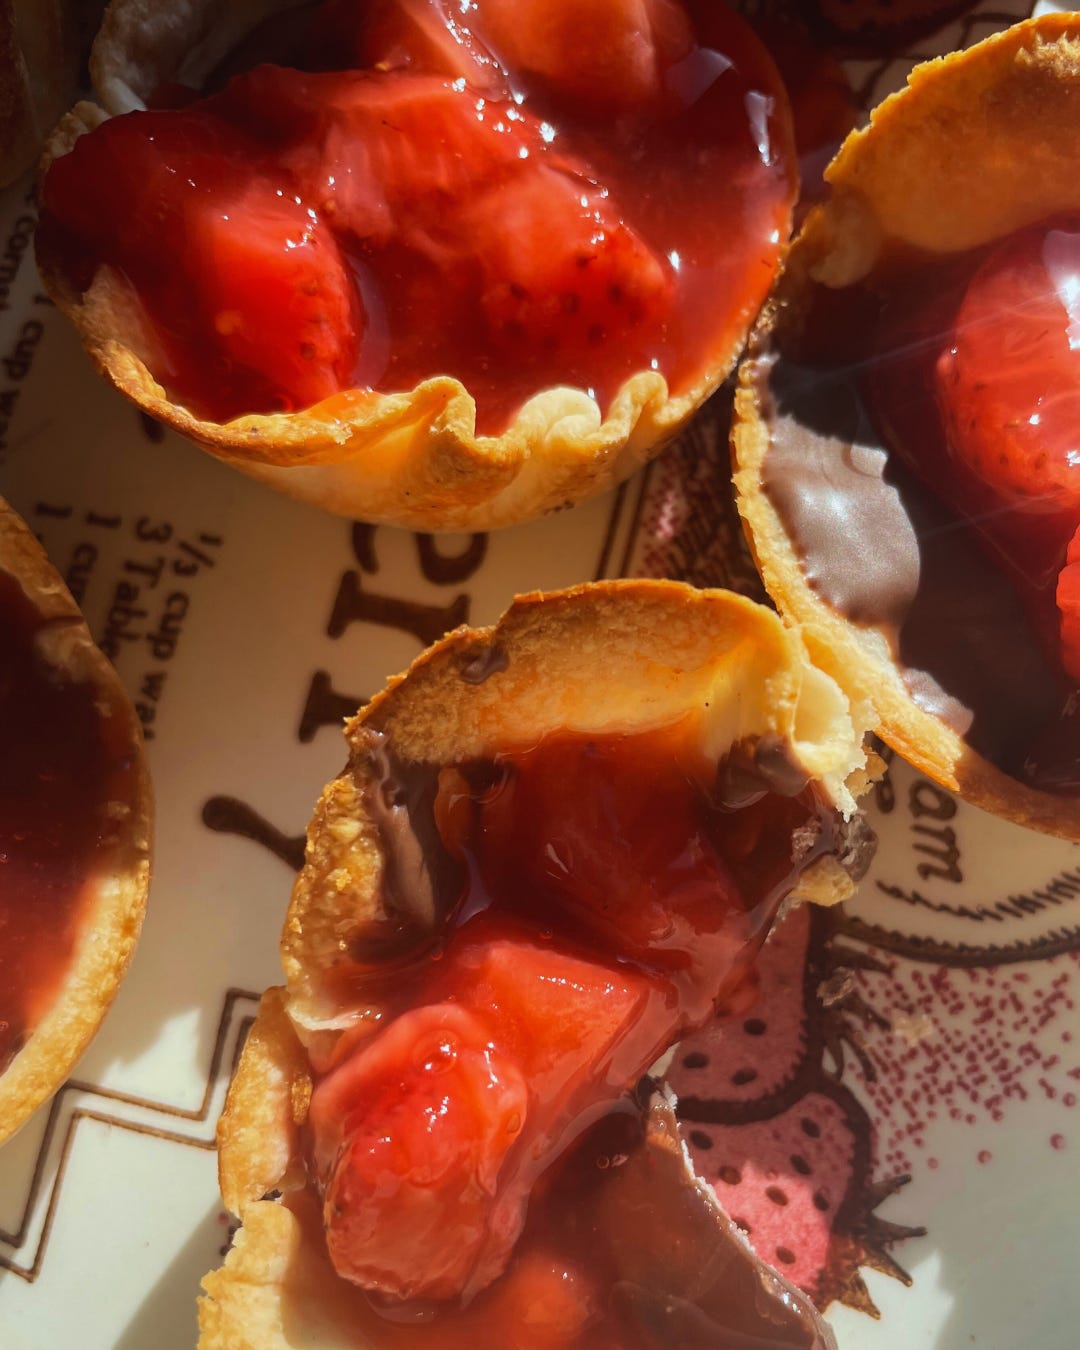
Mini Chocolate Strawberry Pies
Plus the history of commercial glass production


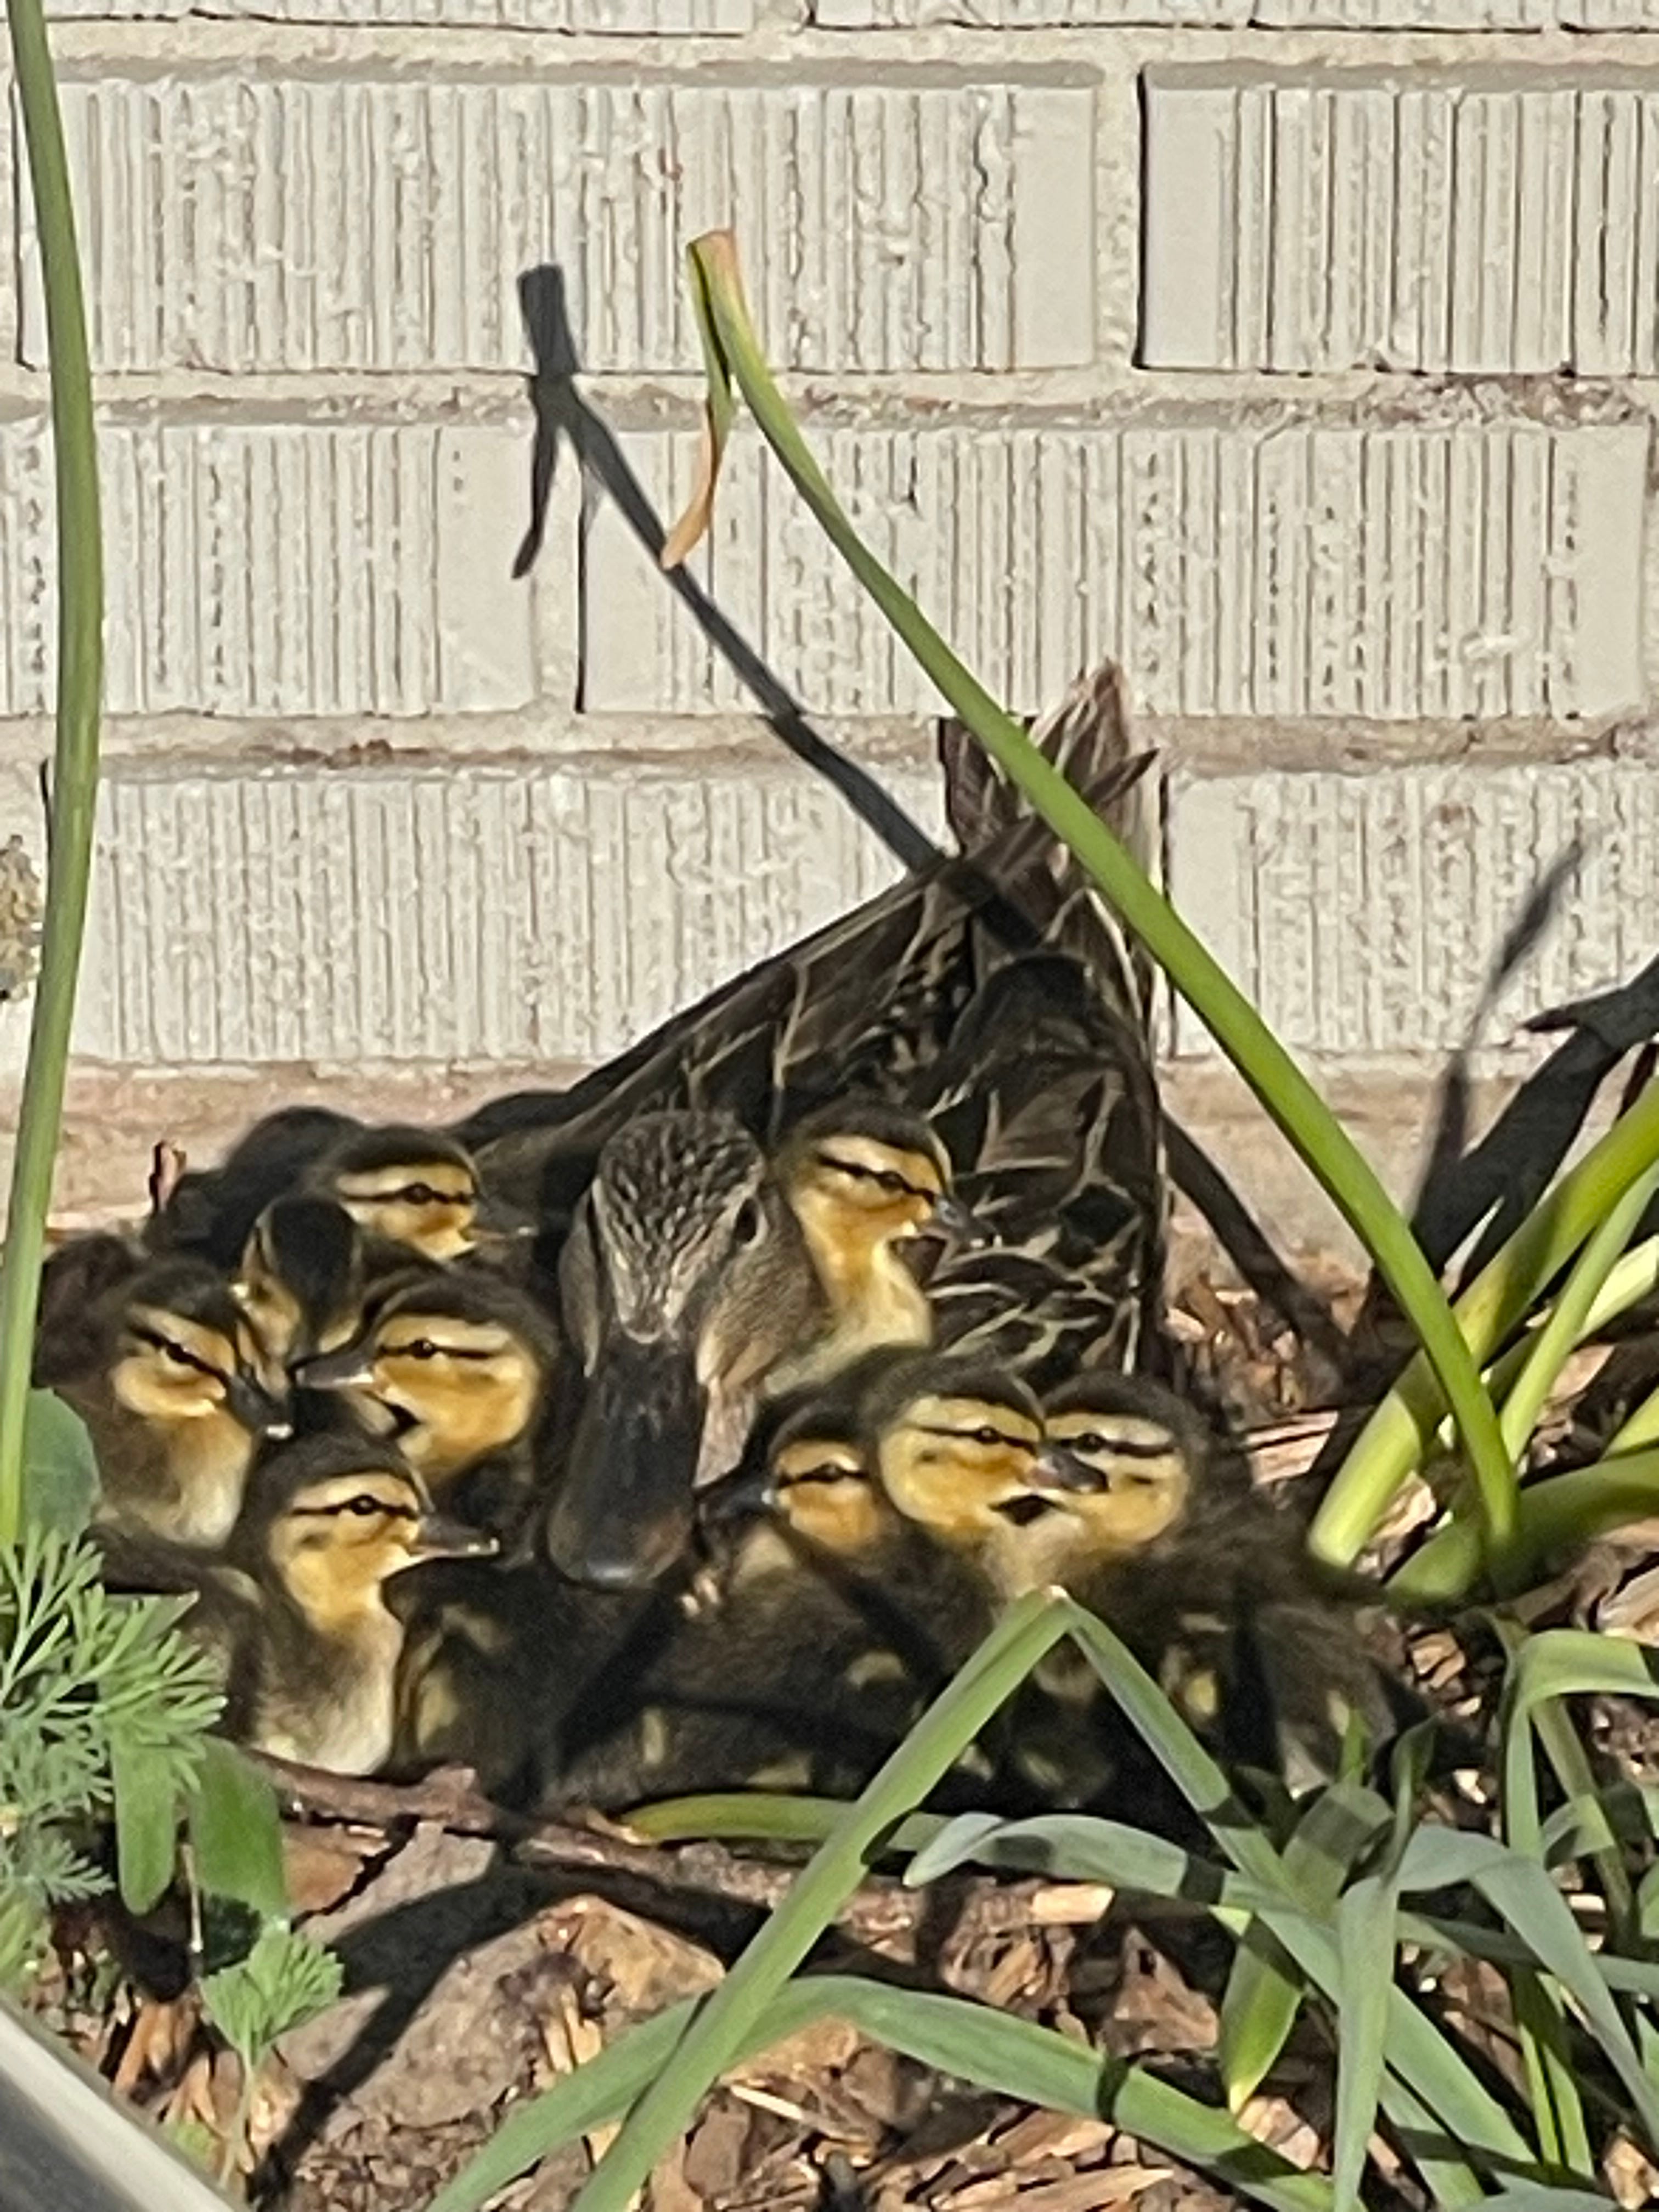
Only a few fun historical facts this week, I’ve been far too busy to go down the online rabbit hole because we’re celebrating a birth in my household! 10 births, actually. The duck that lives in my front garden welcomed 10 beautiful, fluffy, healthy babies yesterday morning. I went inside to make breakfast, and by the time I was finished, they were gone already, on their way to the canal. They grow up so fast.
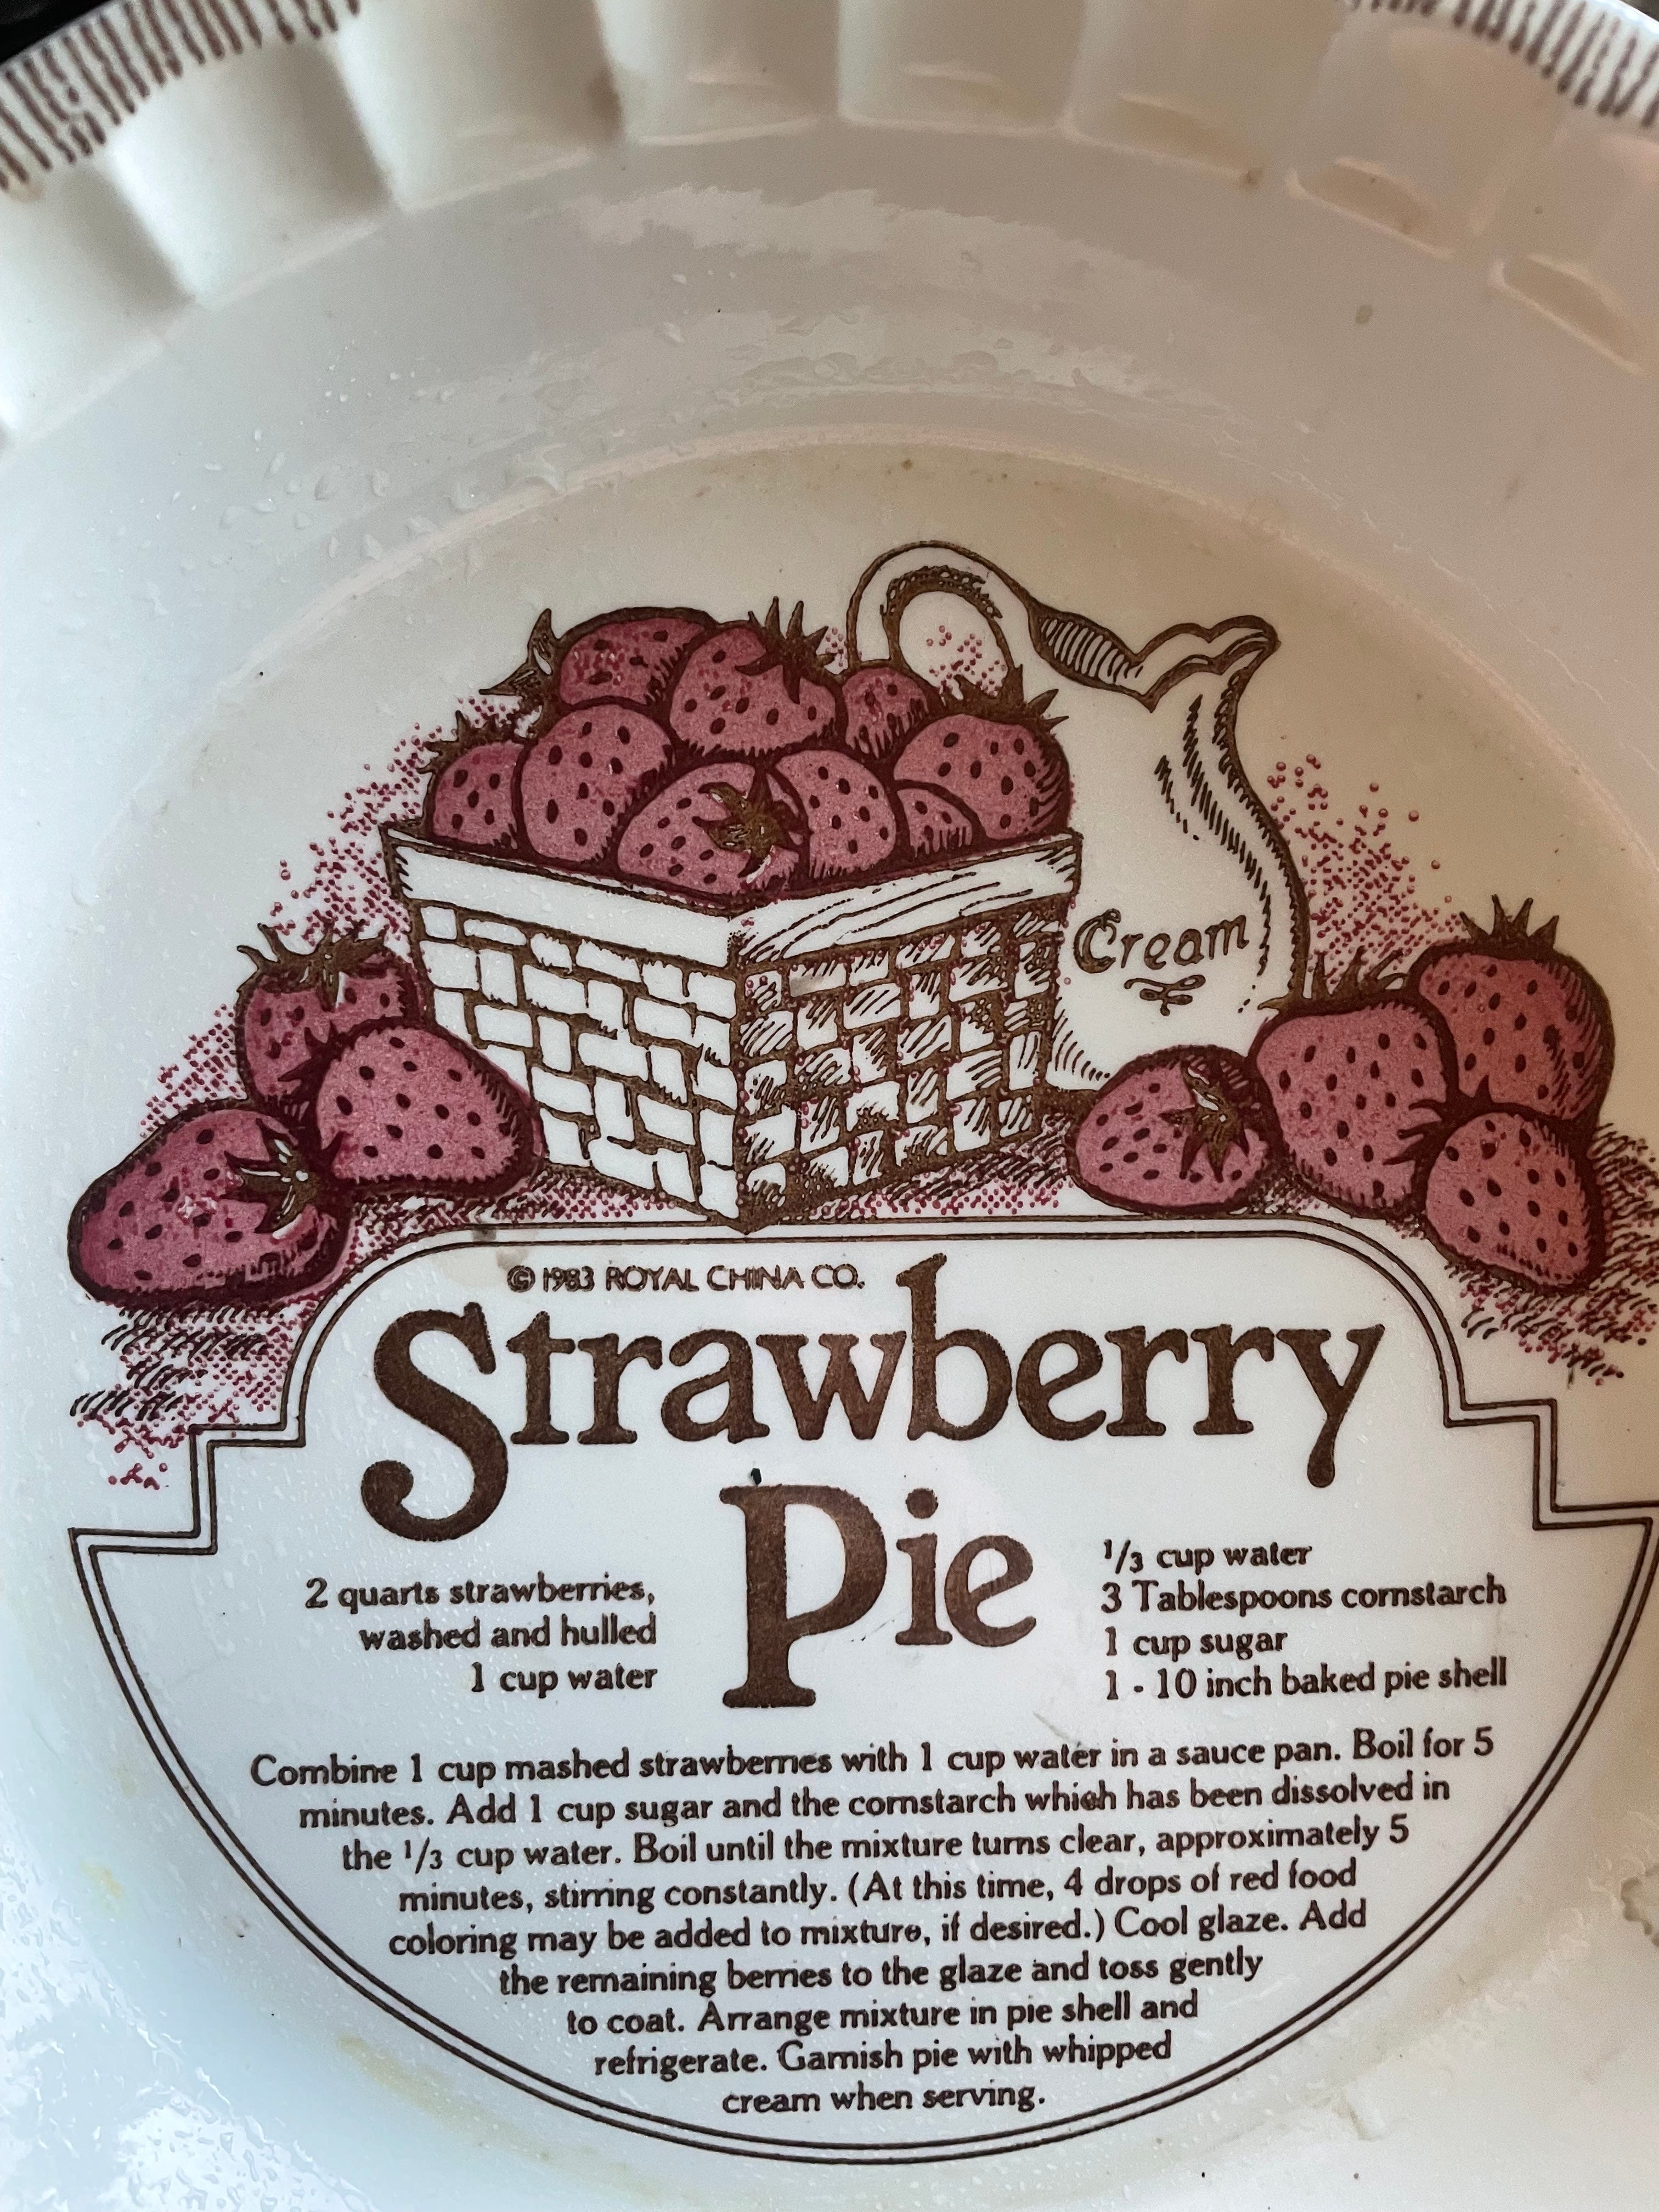
My mom gave me this pie plate when I moved out on my own, and I’ve made many pies in it, just never an actual strawberry pie, strange enough. I started off doing a bit of research about the pie plate itself, and ended up learning more than I ever needed to about the history of glass production.
6 Fast Facts On Glass
The first glass ever used was obsidian, made when lava erupts and then cools really quickly, halting crystal production. The oldest obsidian spear tips were found in East Africa, and are estimated to be 279,000 years old.
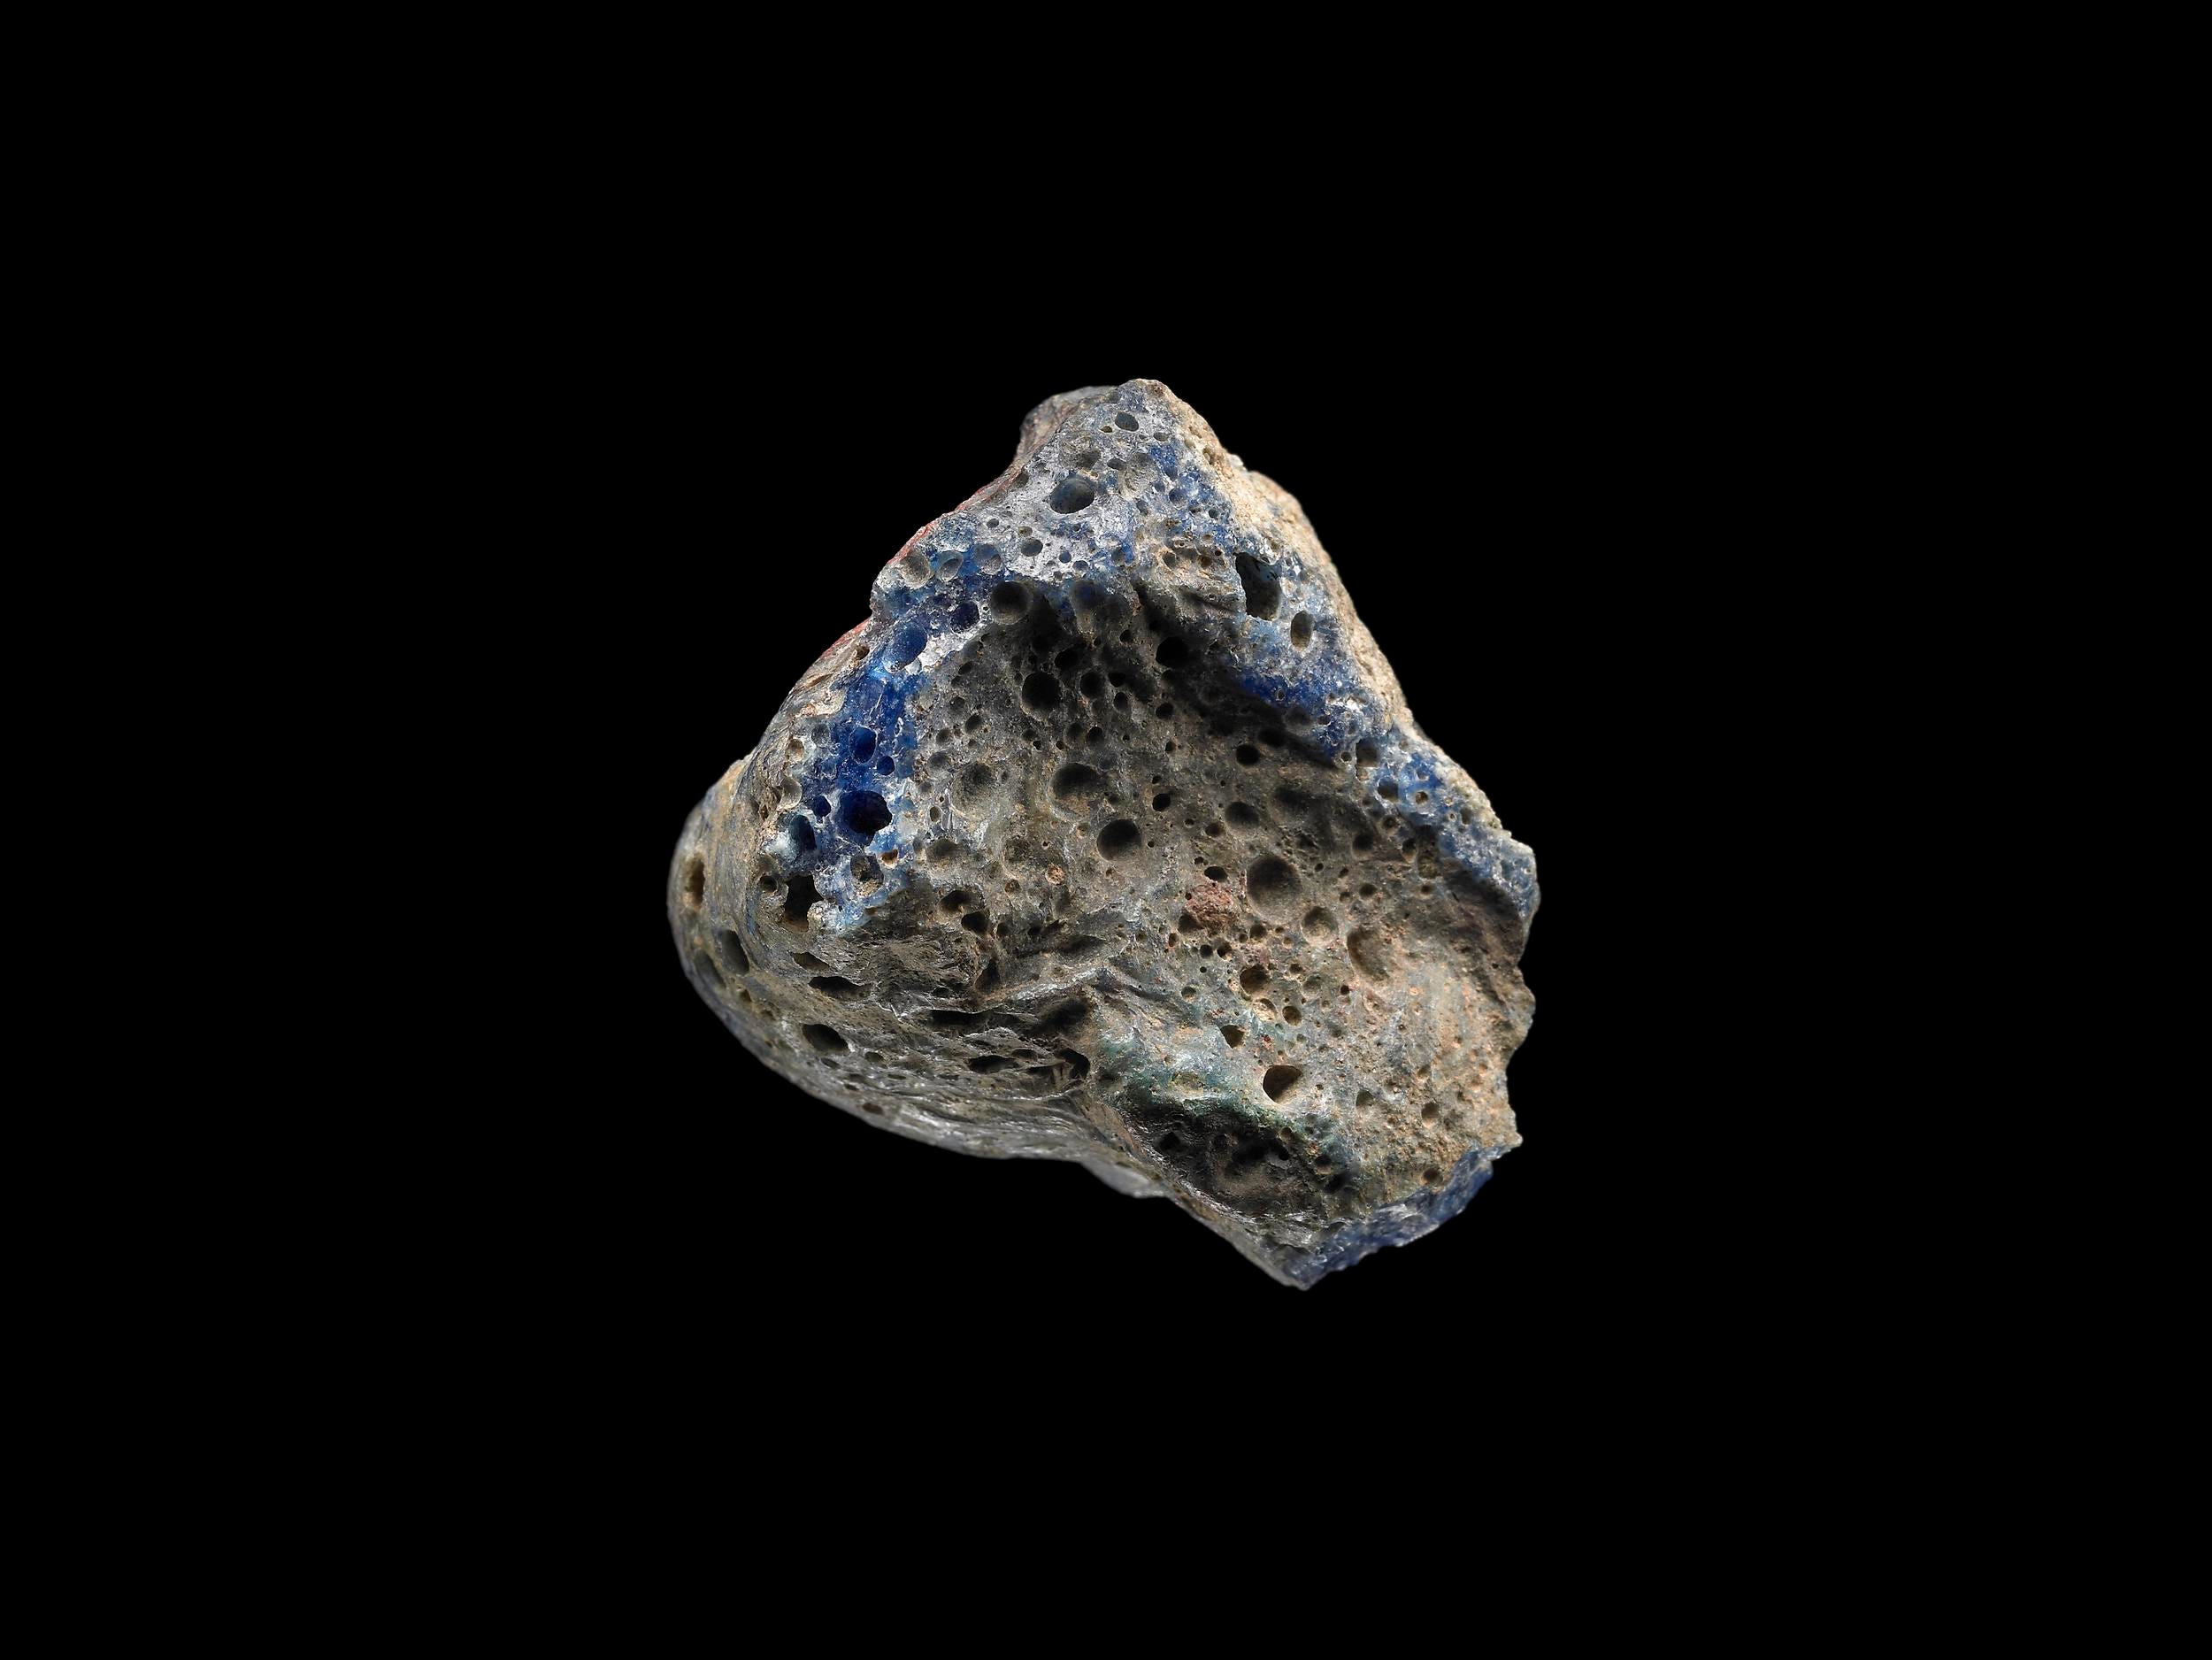
The earliest evidence of manmade glasswork comes from a find from Iraq. Estimated to be from 2050 BCE, this lump of glass is blue, likely from a cobalt additive.
Glass casting, which is putting cold glass over a mold and then firing in a kiln so that it takes on the shape of the mold, was introduced in Egypt and Mesopotamia in the 15th century BC.
That being said, mass production of glass didn’t start until the 19th century. British engineers patented the first glass molding machines in the early 1800’s, which led the way for the first mass produced glass bottle machines in the later half of the century.
A market research firm called The Brainy Insights has valued the current global glassware market at $4.9 Billion as of 2023, which potential for 1.28% growth in the next decade.
Glass is 100% recyclable, forever. If you live in Boise, we unfortunately can’t put glass in our normal recycling bins, but you can drop off glass at a ton of locations around the valley. Several Albertsons in town have glass drop off collection bins. You can also pay $8/month to have a dedicated glass bin, if you’re going through glass like nobody’s biz.
Mini Chocolate Strawberry Pies
Makes 12 tiny pies. I used dark chocolate but do whatever makes you (or your motha) happy! These tiny pies bake in a muffin tin. I used a wide-mouthed jar to cut out mini pie crusts and it ended up being the perfect size.
Ingredients
(1) 9” pie crust, premade is fine. If you’d like to make it yourself, I point you as always to the expert, Sally.
2 c. strawberries (or 1/2 of a quarter container)
1/3 c. water
1/2 c. sugar
1 tbsp cornstarch
1/2 tsp vanilla
Squeeze of lemon
1 c. chopped chocolate of your choosing OR 1 c. chocolate melting wafers, if you don’t want to bother with tempering the chocolate.
Process
Preheat the oven at 425. If you bought a premade pie crust, let sit at room temp until pliable (around 20 minutes). If you’re making your own pie crust, roll out the dough to 1/16” thickness. Using a wide mouthed jar, cut out 12 circles. You may need to ball up the dough and roll it out again to get to 12.
Once you have 12 rounds, roll them out so they’re just a bit thinner. Grease a muffin tin, and put pie dough in each spot on the muffin tin, taking extra care to press the dough up against the sides so it doesn’t slip down.
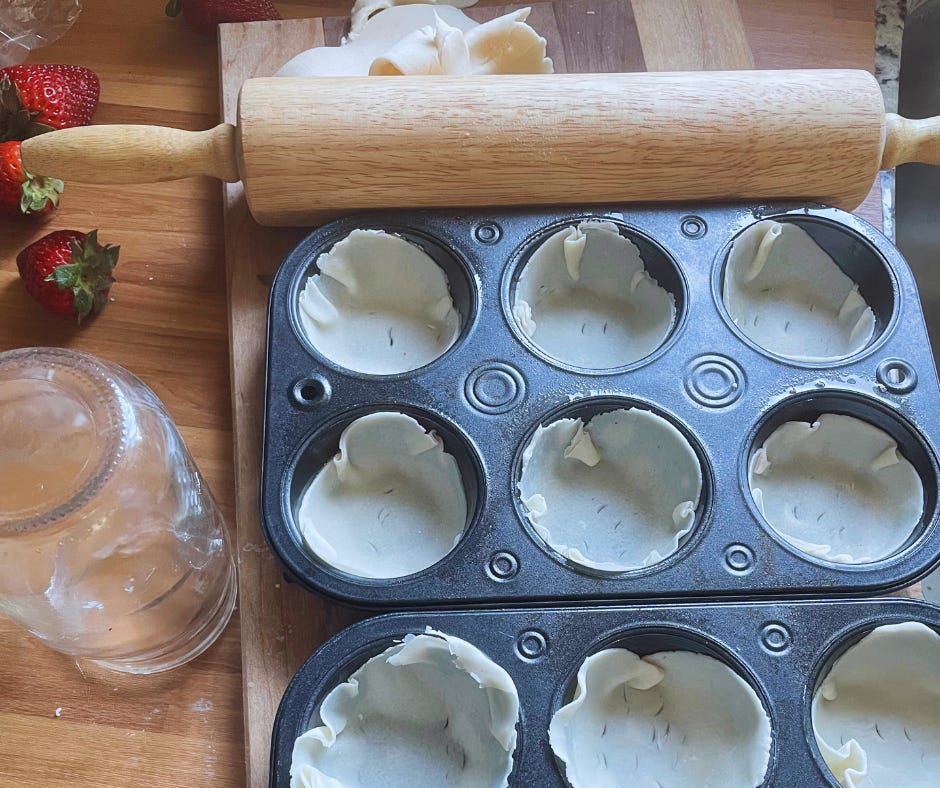
Using a fork, poke a few holes in the bottom of each mini crust to make sure they don’t puff up and lose their shape.
Pop in the oven at 425 for 7 minutes- If they’re browning on the edges, they’re done. You don’t want too much browning, just the smallest bit on the edges.
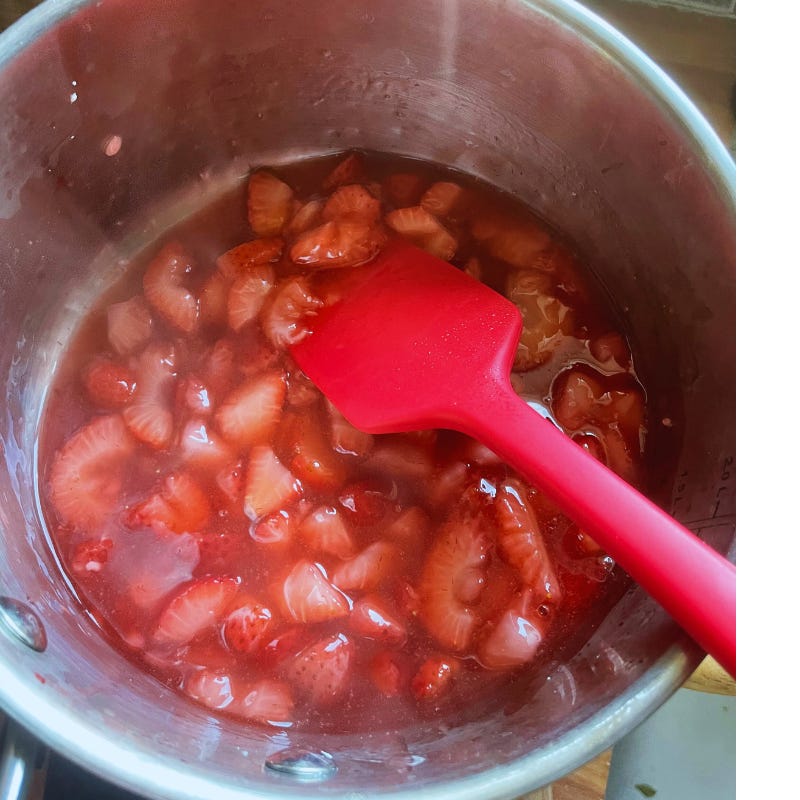
For the strawberry filling, cut the stems off your berries and chop to your desired size. I cut them into quarters.
Add your berries, water, and sugar to a saucepan on medium high heat. Bring to a boil, add cornstarch, and stir until fully combined and the lumps are all gone. Add vanilla and lemon, and let cool completely.
Once the mini crusts are done, pull them out of the oven and let cool in the tray on a wire rack.
Once the crusts and filling are complete, you’re going to either A) microwave your chocolate melting wafers according to the instructions on the back or you’ll B) temper your chocolate if you’re not using melting wafers. If you’re doing option A, you can skip down to the section below. The point of tempering chocolate is to make it harden once cool- melting wafers have oil based additives that do just that. If you’re not cool with the oil additives, you can temper your chocolate instead with the same effect.
It’s helpful to have a thermometer for tempering. Put a bowl glass or metal bowl on top of a saucepan filled with water to make a double boiler. Add 3/4s of the chocolate to the top and stir while it melts, until the chocolate reaches 110-115 degrees Fahrenheit. Don’t go over 120, it will likely seize up and get lumpy.
Once you hit 110-115, pull off the heat, set on the counter or on a towel, and add the remaining chocolate while stirring. Let it cool to 95-100 degrees, and once you hit that, you can put it in the pies.
If you’re not tempering your chocolate, skip down HERE.
Spoon a small bit of chocolate in the bottom of each of the pies and let chill in the fridge for 5-10 minutes.
Once the chocolate has set up, spoon a heaping spoonful of strawberries on top. These will stay good in the fridge for a day once assembled, but can last 3 days if you leave the strawberry topping in a airtight container and assemble before eating. Enjoy!